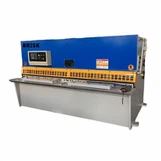
Hey there! I'm working with a CNC Press Brake supply business, and today I'm gonna share some tips on how to adjust the backgauge of a CNC press brake. Whether you're a newbie in the metal - bending world or a seasoned pro looking for a refresher, this guide is for you.
Understanding the Backgauge
First off, let's talk about what the backgauge is. The backgauge in a CNC press brake is a crucial component. It's responsible for positioning the metal sheet accurately before the bending process. Think of it as the guide that helps you get the perfect bend every time. Without a properly adjusted backgauge, you'll end up with inconsistent bends, which can be a real headache in a production environment.
Pre - adjustment Checks
Before you start adjusting the backgauge, there are a few things you need to do. Make sure the press brake is turned off and unplugged. Safety first, right? Check the backgauge for any visible damage, like cracks or bent parts. If you notice anything wrong, it's best to get it fixed before proceeding. Also, clean the backgauge and the surrounding area. Dust and debris can affect the accuracy of the adjustment.
Measuring the Backgauge Position
The first step in adjusting the backgauge is to measure its current position. You can use a precision measuring tool, like a caliper or a micrometer. Measure the distance from the backgauge to the front of the press brake's lower die. Write this measurement down. This will serve as your baseline.
Adjusting the Backgauge Manually
Most CNC press brakes allow for manual adjustment of the backgauge. To do this, locate the adjustment screws or knobs on the backgauge assembly. These are usually located on the side or at the back of the backgauge. Use a suitable tool, like a wrench or a screwdriver, to turn the adjustment screws.
If you need to move the backgauge forward, turn the screw clockwise. If you need to move it backward, turn the screw counter - clockwise. Make small adjustments at a time, and keep re - measuring the position until you reach the desired distance.
Using the CNC Control System
If your press brake has a CNC control system, you can also adjust the backgauge through it. First, turn on the press brake and access the control panel. Navigate to the backgauge adjustment menu. Here, you can input the desired position for the backgauge.
The CNC system will then automatically move the backgauge to the specified position. This method is more precise and faster than manual adjustment, especially for complex bending operations. However, you need to be familiar with the CNC control system's interface. If you're not, refer to the user manual or get some training.
Fine - tuning the Backgauge
Once you've set the backgauge to the approximate position, it's time for fine - tuning. Take a test piece of metal and place it against the backgauge. Make a small bend on the test piece. Measure the bend angle and the length of the bent part.
If the bend is not accurate, make small adjustments to the backgauge position. You may need to repeat this process several times until you get the perfect bend. Remember, even a small change in the backgauge position can have a big impact on the final result.
Syncing Multiple Backgauge Axes
Some CNC press brakes have multiple backgauge axes, like X, Y, and Z axes. These axes need to be synchronized for accurate bending. To sync the axes, use the CNC control system. Navigate to the axis synchronization menu.
The system will guide you through the process of aligning the axes. This usually involves moving each axis to a reference position and then adjusting them to match. Once the axes are synchronized, the backgauge will move smoothly and accurately in all directions.
Maintaining the Backgauge
After adjusting the backgauge, it's important to maintain it properly. Regularly lubricate the moving parts of the backgauge, like the screws and the guide rails. This will prevent wear and tear and ensure smooth operation.
Also, check the backgauge's position periodically, especially after a long period of use or after moving the press brake. Over time, vibrations and normal wear can cause the backgauge to shift out of position.
Common Problems and Solutions
Sometimes, you may encounter problems when adjusting the backgauge. One common problem is the backgauge not moving smoothly. This could be due to a lack of lubrication or a build - up of debris. Clean and lubricate the moving parts to fix this issue.
Another problem is inaccurate positioning. This could be caused by a calibration error in the CNC control system or a mechanical problem with the backgauge. Check the calibration settings in the CNC system and inspect the backgauge for any mechanical issues.


Conclusion
Adjusting the backgauge of a CNC press brake is a skill that takes time and practice. But with the right tools and knowledge, you can do it like a pro. Remember to always follow safety procedures, make small adjustments, and double - check your measurements.
If you're in the market for a new CNC press brake, we've got some great options for you. Check out our Hydraulic Sheet Bending Machine, Small Electric Press Brake Machine, and Press Brake Bending Machine.
If you have any questions or are interested in purchasing a CNC press brake, feel free to reach out to us. We're here to help you find the perfect machine for your needs and ensure you get the most out of it.
References
- Press Brake Operator's Manual
- Metal Bending Handbook