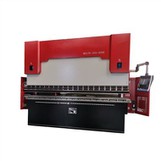
Hey there, folks! As a supplier of Sheet Metal Press Brake, I've seen my fair share of issues with these machines, and one common problem that pops up is worn-out hydraulic seals. Today, I'm gonna walk you through the process of replacing the hydraulic seals in a sheet metal press brake.
Why Replace Hydraulic Seals?
Before we dive into the replacement process, let's talk about why it's so important to keep those hydraulic seals in good shape. Hydraulic seals play a crucial role in the operation of a press brake. They prevent hydraulic fluid from leaking out of the cylinders, which is essential for maintaining the pressure needed to bend and shape metal sheets.
When the seals start to wear out, you might notice a few telltale signs. There could be visible leaks around the cylinders, a decrease in the press brake's performance, or increased noise during operation. Ignoring these issues can lead to more serious problems down the line, like damage to the hydraulic system or even a complete breakdown of the machine. So, it's always better to address seal issues as soon as you spot them.
Tools and Materials You'll Need
First things first, you'll need to gather the right tools and materials for the job. Here's a list of what you'll typically need:
- Replacement Seals: Make sure you get the right seals for your specific press brake model. You can usually find this information in the machine's manual or by contacting the manufacturer.
- Wrenches and Socket Sets: You'll need these to loosen and tighten various bolts and nuts.
- Pliers: Useful for removing retaining rings and other small parts.
- Cleaning Supplies: You'll want to clean the cylinders and other components before installing the new seals. A degreaser and some clean rags should do the trick.
- Hydraulic Fluid: You'll need to refill the system with fresh hydraulic fluid after the replacement is done.
Step-by-Step Replacement Process
Step 1: Safety First
Before you start working on the press brake, make sure you take all the necessary safety precautions. Turn off the machine and disconnect it from the power source. Release any pressure in the hydraulic system by operating the press brake's control valves. Wear appropriate safety gear, like gloves and safety glasses, to protect yourself from any potential hazards.
Step 2: Remove the Cylinders
The next step is to remove the cylinders from the press brake. This usually involves loosening the bolts that hold the cylinders in place and disconnecting the hydraulic hoses. Be careful not to damage the hoses or the fittings when you're doing this. Once the cylinders are free, carefully remove them from the machine and place them on a clean, flat surface.
Step 3: Disassemble the Cylinders
Once you have the cylinders out, it's time to disassemble them to access the seals. Start by removing the end caps or retaining rings using a suitable tool, like pliers or a wrench. Then, carefully slide the piston out of the cylinder. You might need to use a bit of force, but be careful not to damage the cylinder walls or the piston.
Step 4: Remove the Old Seals
With the piston out, you can now remove the old seals. Use a seal removal tool or a small flat-tip screwdriver to gently pry the seals out of their grooves. Be careful not to scratch the cylinder walls or the piston during this process. Once the old seals are out, use a clean rag and some degreaser to clean the grooves and remove any dirt or debris.
Step 5: Install the New Seals
Before installing the new seals, make sure they're the right size and type for your press brake. Apply a thin layer of hydraulic fluid to the seals to lubricate them and make them easier to install. Then, carefully insert the seals into their grooves, making sure they're seated correctly. Use a seal installation tool or a small flat-tip screwdriver to gently press the seals into place.
Step 6: Reassemble the Cylinders
Once the new seals are installed, it's time to reassemble the cylinders. Slide the piston back into the cylinder, making sure it's aligned correctly. Then, reinstall the end caps or retaining rings and tighten them to the specified torque using a wrench or socket set.
Step 7: Reinstall the Cylinders
With the cylinders reassembled, it's time to reinstall them in the press brake. Carefully position the cylinders in their original locations and tighten the bolts that hold them in place. Then, reconnect the hydraulic hoses, making sure they're properly tightened and leak-free.
Step 8: Refill the Hydraulic System
After reinstalling the cylinders, you'll need to refill the hydraulic system with fresh hydraulic fluid. Refer to the machine's manual for the correct type and amount of fluid to use. Open the fill cap and slowly pour the fluid into the reservoir until it reaches the recommended level.
Step 9: Test the Press Brake
Once the hydraulic system is refilled, it's time to test the press brake. Reconnect the power source and turn on the machine. Operate the press brake's control valves to check for any leaks or abnormal noises. If everything seems to be working properly, you're good to go!
Tips and Tricks for a Successful Replacement
- Follow the Manual: Always refer to the press brake's manual for detailed instructions and specifications. This will ensure that you do the replacement correctly and avoid any potential problems.
- Take Your Time: Replacing hydraulic seals is a delicate process that requires patience and attention to detail. Don't rush through the steps, and make sure you do everything correctly.
- Inspect the Components: While you have the cylinders disassembled, take the opportunity to inspect other components, like the cylinder walls and the piston, for any signs of wear or damage. If you notice any issues, address them before reinstalling the cylinders.
- Keep It Clean: Cleanliness is key when working with hydraulic systems. Make sure you keep all the components clean and free of dirt and debris to prevent any contaminants from entering the system.
Conclusion
Replacing the hydraulic seals in a sheet metal press brake might seem like a daunting task, but with the right tools, materials, and a bit of know-how, it's definitely doable. By following the steps outlined in this blog post, you can keep your press brake in top condition and avoid costly repairs down the line.
If you're in the market for a Sheet Metal Press Brake, a CNC Hydraulic Press Brake, or a Press Brake Bending Machine, we've got you covered. We offer a wide range of high-quality press brakes and bending machines to meet your needs. If you have any questions or would like to discuss your specific requirements, feel free to reach out to us. We're here to help you find the perfect solution for your metal fabrication needs.


References
- Manufacturer's manuals for sheet metal press brakes
- Industry best practices for hydraulic system maintenance