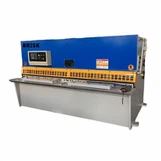
As a supplier of metal shear cutters, I understand that the installation process can seem daunting, especially for those new to the machinery. In this blog, I'll guide you through the step - by - step process of installing a metal shear cutter, ensuring that you can get your equipment up and running smoothly.
Pre - installation Preparations
Before you start the installation, it's crucial to make some preparations. First, select an appropriate location for your metal shear cutter. The area should be flat, stable, and have enough space around the machine for safe operation. It should also be well - ventilated to prevent the build - up of heat and fumes.
Check the dimensions of the machine and make sure the chosen location can accommodate it. Measure the length, width, and height of the metal shear cutter and compare it with the available space. You should leave at least a few feet of clearance on all sides to allow for easy access during operation and maintenance.
Next, gather all the necessary tools for the installation. These typically include wrenches, screwdrivers, and a level. You may also need a crane or forklift if the machine is heavy. Ensure that all tools are in good working condition.
Unpacking and Inspection
Once you have the location and tools ready, it's time to unpack the metal shear cutter. Carefully remove the machine from its packaging, taking note of any protective materials used. Inspect the machine for any visible damage during transit. Check for dents, scratches, or loose parts. If you find any issues, contact the shipping company and your supplier immediately.
Also, check the components included in the package. Make sure you have all the parts listed in the user manual, such as the cutting blade, control panel, and any additional accessories.
Assembly
The assembly process can vary depending on the type of metal shear cutter. For some smaller models like the Benchtop Metal Shear Machine, the assembly may be relatively straightforward. You'll typically start by attaching the base to the main body of the machine. Use the provided bolts and nuts and tighten them securely with a wrench.
For larger and more complex machines, such as the Metal CNC Shear Cutter, the assembly may involve multiple steps. You may need to install the hydraulic system, electrical components, and the cutting mechanism. Follow the detailed instructions in the user manual carefully.
When installing the cutting blade, ensure that it is properly aligned and tightened. A misaligned blade can lead to poor cutting performance and may even damage the machine. Use a level to make sure the blade is straight and parallel to the cutting surface.
Electrical and Hydraulic Connections
Most metal shear cutters require both electrical and hydraulic connections. For the electrical connection, first, make sure the power supply matches the requirements of the machine. Check the voltage and amperage ratings in the user manual. Connect the power cord to a grounded electrical outlet.
When it comes to the hydraulic system, you'll need to connect the hydraulic hoses to the appropriate ports on the machine. Make sure the connections are tight to prevent any hydraulic fluid leaks. Before starting the machine, check the hydraulic fluid level and top it up if necessary.
Testing and Calibration
After the installation is complete, it's time to test the machine. Turn on the power and check if all the controls are working properly. Test the cutting function by making a few trial cuts on a scrap piece of metal. Observe the cutting performance, such as the smoothness of the cut and the accuracy of the dimensions.


If the cuts are not satisfactory, you may need to calibrate the machine. This could involve adjusting the blade clearance, the cutting speed, or the back gauge. Refer to the user manual for specific calibration procedures.
Safety Considerations
Safety is of utmost importance when installing and operating a metal shear cutter. Make sure to wear appropriate personal protective equipment (PPE), such as safety glasses, gloves, and ear protection. Keep the work area clean and free of clutter to prevent tripping hazards.
Before starting the machine, ensure that all guards and safety devices are in place and functioning properly. These include blade guards, emergency stop buttons, and safety interlocks. Do not attempt to remove or bypass any safety features.
Maintenance
Regular maintenance is essential to keep your metal shear cutter in good working condition. After installation, establish a maintenance schedule. This may include lubricating moving parts, checking the hydraulic fluid level, and inspecting the cutting blade for wear.
For more detailed maintenance procedures, refer to the user manual. Some machines may require professional servicing at regular intervals.
Conclusion
Installing a metal shear cutter may seem like a complex task, but by following these steps and the instructions in the user manual, you can ensure a successful installation. Whether you're using a Benchtop Metal Shear Machine, a Metal CNC Shear Cutter, or an Aluminum Shear Cutting Machine, proper installation is the key to optimal performance.
If you have any questions about the installation process or are interested in purchasing a metal shear cutter, feel free to reach out. Our team of experts is ready to assist you with all your metal cutting needs. We offer a wide range of high - quality metal shear cutters that are suitable for various applications. Contact us to start a discussion about your requirements and find the perfect machine for your business.
References
- Manufacturer's user manual for the metal shear cutter
- Industry standards and guidelines for metal shear cutter installation and operation